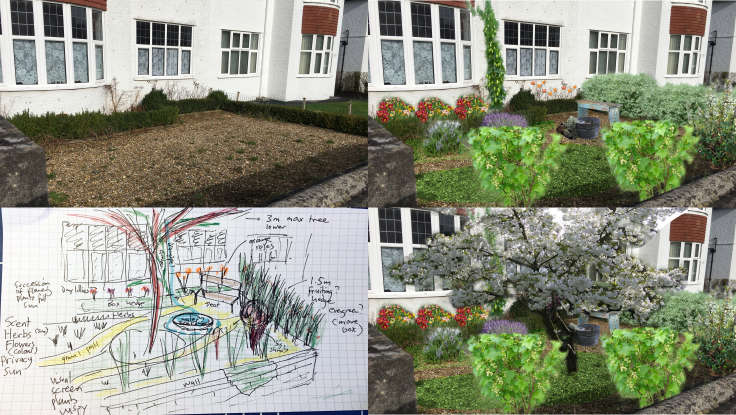
Starting with a photo, I created a rough sketch to elicit feedback from the client, before moving on to a couple of scampy montages. CAD is the next stage.
A small garden can be a forest garden, and this is a peek into how I approach a small forest garden design.
I really think that your small garden can be a forest garden, because to be a forest garden is more abut the principles than the size. To recap, the principles are:
- Productive
- Multi-layered
- Permanent ground cover
- Sustainable
- Low maintenance
I’m working on a fantastic project in Llandeilo, a small south-facing front garden, in collaboration with the can-do Permaculture Tywi. I’m creating the design and then a crack squad of community-minded permies will wreak beautiful acts of creation in just one day.
To start, I visited the site and talked at length with both the client and also June and Anne from the group. We then took photographs of the site, poked around and measured up.
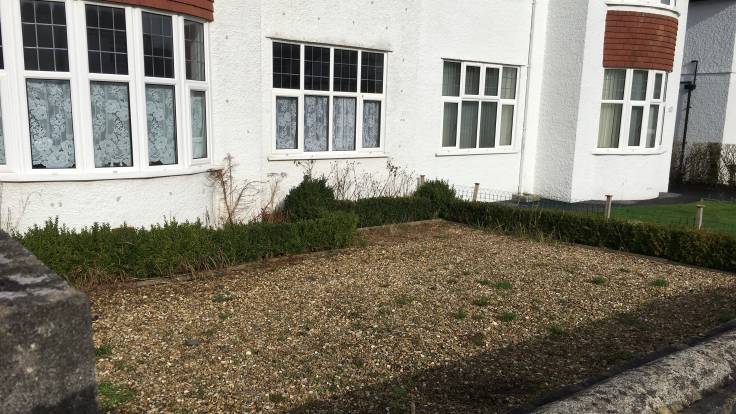
View of the front garden from the pavement
A very useful tool in this process is to look at where the sun will be at different times of the year. There’s an excellent app called Sun Surveyor, which gives you an augmented reality view across the calendar.
My first step back home was to create a very rough sketch, in pen and £1 coloured pencils. This was to get some ideas across to the client before creating anything too polished, the “Make the big mistakes early” gambit. At this stage, you don’t have to be specific about plants, just a general sense about their size, habit and shape. Afterwards, you can pick specific plants and even cultivars to suit the spot.
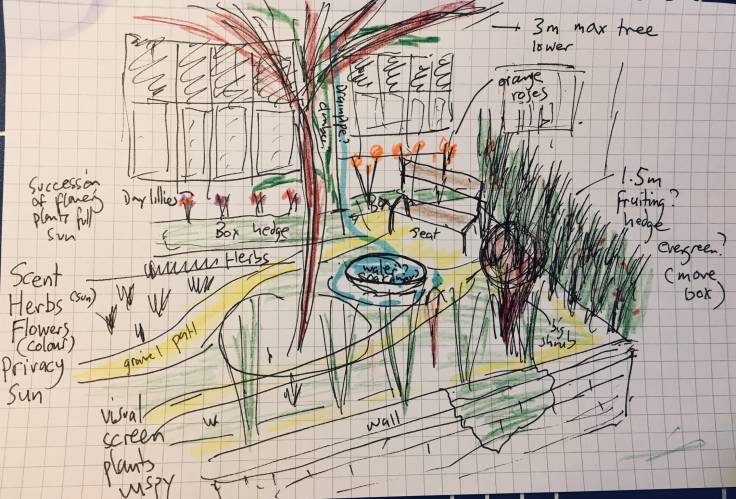
A loose sketch to communicate some ideas
I had some good feedback from the client, namely that they might not want to sit in the front garden, so we agreed that the seat would be a movable bench, and that they really like cherry trees! A local supplier recommended ‘Stella’, a self-fertile cultivar, and I recommended using Gisela 5 rootstock, which grows to around 2.5m and needs to be permanently staked.
After hearing Sarah Price talk at Botanic Garden Wales, I was compelled to unleash my rusty Photoshop skills and put together a photomontage of the garden. Her photomontages are a work of art, mine are more, er, Teletubby! It was a fun process though, and again, gives an idea of what can be achieved.
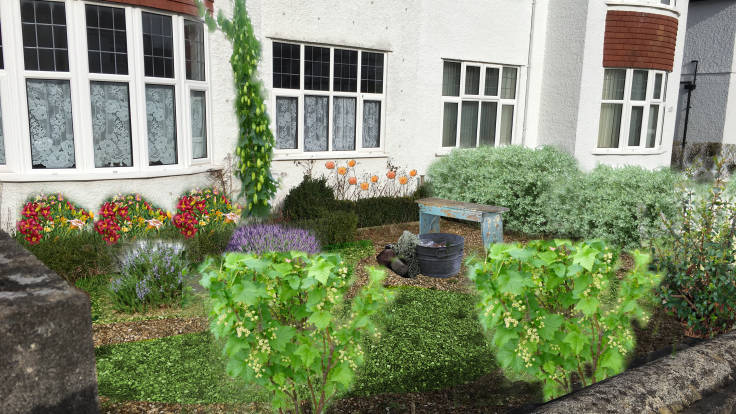
The photomontage, without the cherry tree, giving an idea of what plants could go where
Only at this stage did I move on to the CAD plan. I started with a screengrab from the Ground Stability website, which is a hi-res Ordnance Survey map, using it as a guide for the measurements that were taken. An alternative is to use a satellite photo; I found the best ones to be on Apple Maps and the mobile app Theodolite.
The software I use is QCAD, which is Open Source software with a limited free version available. Any CAD software is complicated and I wouldn’t recommend it for one-off, casual use (have a look at Inkscape for less exacting requirements). Having said that, it is brilliant. I’m just getting the hang of QCAD’s NURBS for drawing curvy lines and the hatch functionality for filling areas.
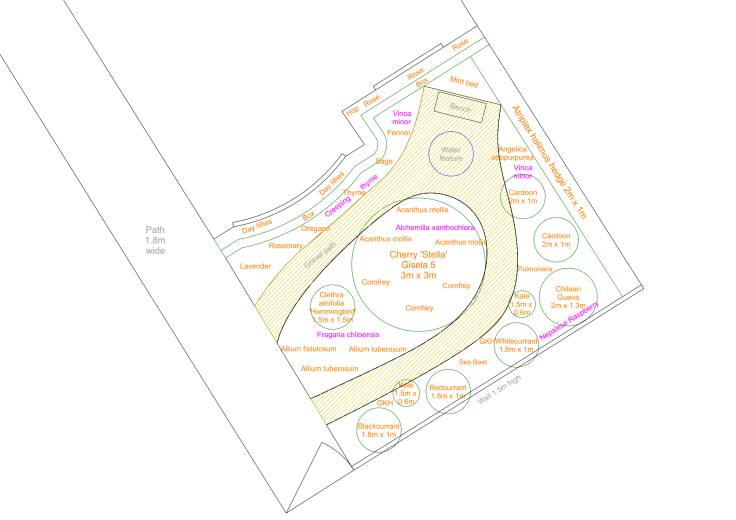
The final CAD plan, showing the path, water feature, seating area and plant diameters
The key advantage to using CAD is that you can calculate the final diameters of plants. This is particularly important for a forest garden, as you want to leave a gap of about ¼-½ of the average tree diameters, so that enough light gets through to understorey plants. Another advantage is that it’s super easy to calculate areas and distances, which is useful when ordering materials.

A prunus in blossom; this is an Early Prolific plum but you get the idea!
As you can see from the plan, the star of the show is the ‘Stella’ cherry, at the heart of the garden. This is underplanted with Alliums on one side and Lady’s Mantle and Bears Breeches on the more shaded side. There’ll be two paths re-using the gravel going around the tree to the corner, where there’ll be some sort of water feature (eg a small wildlife pond in an old Belfast sink) and a movable bench in the seating area.
Along the south facing wall will be day lillies rising above the clipped box hedge, fronted with mediterranean, sun-loving herbs. By the bench, there’s a lovely bunch of fennel, with mint behind for scent and for pollinators. The hedge with the neighbour is Atriplex halimus, which is relatively easy to manage and likes full sun.
The border along the pavement will have currants planted, to provide both fruit and a visual screen for the rest of the garden.

Simplenote is a good way to publish and collaborate on simple notes
To wrap it up, I’m using Simplenote (and nvALT on the Mac) to publish the notes as a web page. Simplenote uses plain text to write notes, and with the magic of Markdown and remotely hosted images, you can have images in your notes as well!
I hope this blog post has proved useful to someone. Don’t forget, you can sign up to have new blogs delivered straight to your inbox!