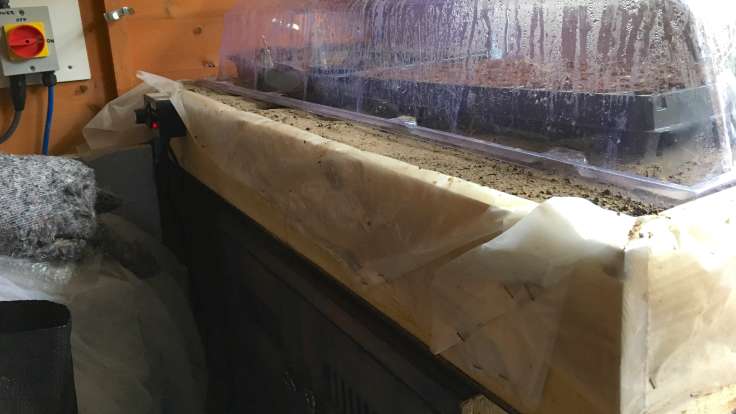
Finished propagator, squeezed into a small shed!
Instructions for making your own thermostatically controlled propagator, cribbed from @GWandShows
http://www.bbc.co.uk/gardenersworld/video/toby_30minfix/heated_propagator.shtml
Equipment needed:
- Screwdriver
- Drill
- 13mm wood drill bit
- Knife
- Pliers
- 6m long heating cable and compatible thermostatic control
- Screws to hold the sides together and attach to base
- RCD device to plug into wall socket if your fuse board doesn’t already contain one.
- Plastic bell cloches
- 6 small bags sharp builders sand
Materials needed:
1 x 60cm x 121cm flat marine
6" x 1", 8’ + ‘4 = 12’(3.6m) - 6" x 1", 8’ + ‘4 = 12’(3.6m)
2 x 15cm wide, 2.5cm thick, 60 cm long edging boards
Old plastic sacks to line the base
Sharp sand to fill box to a depth of 10cm
ply, 2’x4’
6" x 1", 12’
What to do:
- You must be competent and confident at wiring / rewiring a plug to attempt this. If in doubt contact a qualified electrician.
- When working with the cable and thermostat, please follow the instructions supplied by the manufacturer.
- A 6m heating cable is required for an 8sq ft heated bed; other lengths are available so check with the manufacturer which one is required for the size of propagator you are making.
- Start by fixing the edging boards together by screwing into the ends and into the base all the way round. Line the box with old compost bags or polythene to help keep the moisture away from the wood.
- Evenly spread a 2in layer of damp sharp sand over the base.
- Lay the heating cable out on the sand, firming it in slightly to keep it in place, using the pattern suggested in the instruction sheet supplied with it. Add another 2in of damp sand.
- Drill a hole in the side of the propagator base which is big enough to feed the correct end of the heating cable through (read the instructions if in doubt which end to use); feed the cable through carefully.
- Mount the thermostat on the side of the box at the correct height for the temperature probe to sit towards the top of the sand layer and not in contact with the heating cable. Before screwing the box in position you will need to make a hole, slightly larger in diameter than the probe, in the side of the box to feed the temperature probing rod through; it is easiest to do this before the thermostat is wired up.
- Following the instructions carefully, and with the unit unplugged, wire the colour coded wires from the heating cable into the correct terminals of the thermostat unit (if in doubt consult a qualified electrician for this bit). Tighten securely and also tighten up the cable securing screw where the cable was fed into the unit. Finally screw the wire thermostat box onto the side of the box. Plug it into a RCD (residual current device) protected socket. Switch on and set to 21°C. Check that the pilot light is on and that the thermostat switches on and off as the temperature dial is turned up and down.
- Use plastic bell cloches to maintain the moisture over any pots of cuttings which are placed on the heated sand bed.
Suppliers
- Parasene Soil Warming Cable - 6m Length 75 Watts Product Code : 210/6M, Barcode - 5013554142879 £17.99 http://www.garden4less.co.uk/parasene-soil-warming-cable.asp
- Parasene thermostat £28.99
http://www.garden4less.co.uk/proddetail.asp?prod=200