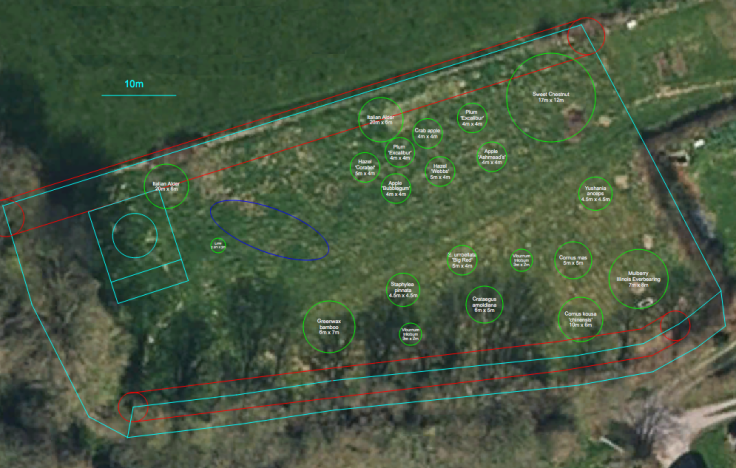
Using satellite photo of Ornamental Forest Garden and QCAD software for planning
It’s not glamorous, it’s not plants but I do really enjoy the design and planning stages of a forest garden. It’s the best time to make the big mistakes 😉
Things have started happening in the Ornamental Forest Garden—we have the beginnings of a Northern Hedge, the plants from ScotPlants Direct are arriving tomorrow, and the digger cometh. There’ll be a level patch for a tent, which will shelter the assembled forest garden workshop attendees, and there will be a pond. Ponds are great: for plants, wildlife, people, for everything and everyone. Because of the slope, the pond is at an angle (see plan above) and will actually be two ponds with a walkway between them. This will reduce the weight of the water on the banked earth.
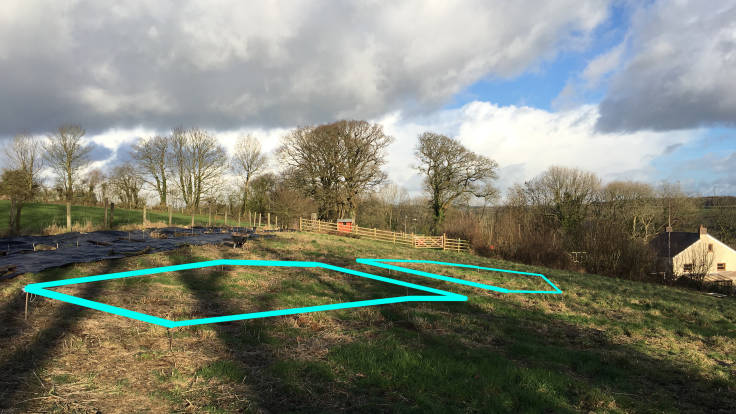
Working out the possible angles and paths of the pond
I roughly marked out the area of the pond with short lengths of bamboo and white string, took a photo and then drew lines in Photoshop. This gives an idea of where the pond will sit in the garden and, equally importantly, where the paths will go.
I think the paths are critical at this stage. I remember with the first forest garden that the design started with the polytunnel and raised beds and worked outwards. Likewise, the design in the Ornamental Forest starts with the tent, the area around the tent, the pond and then works outwards. I have a pretty good idea that the sun-loving fruit trees will fit past the pond, and the mulberry and Cornus kousa will lie in the more sheltered south eastern corner. But the paths, they are critical in joining it all together, so that everything flows.
Gardening, the pastime of visionaries.